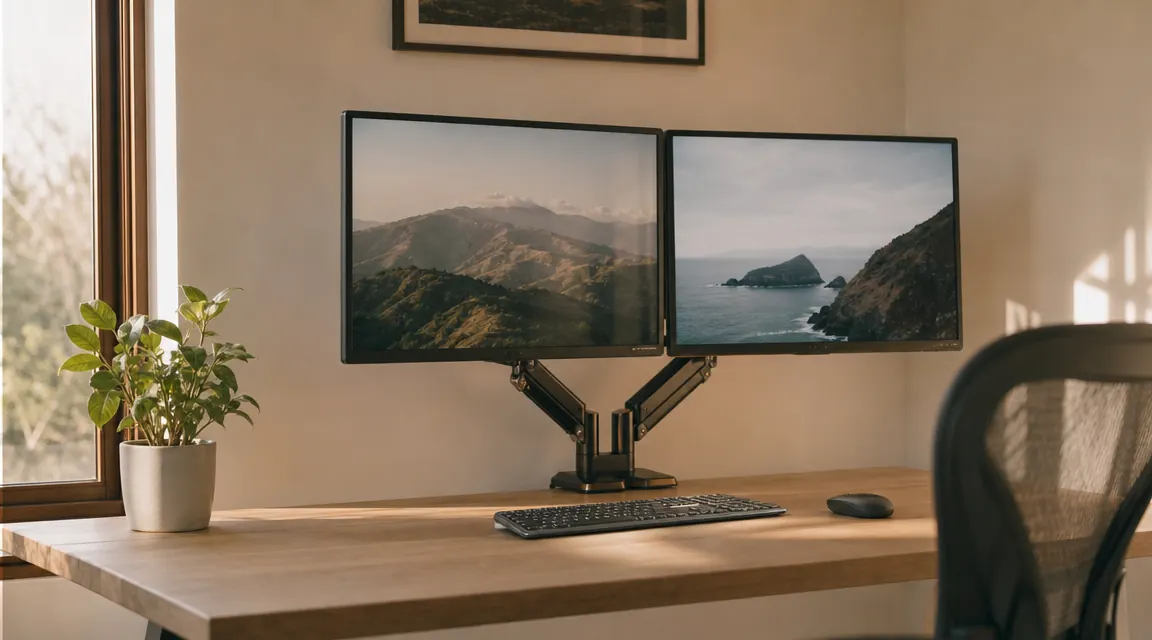
For about three years, I had two monitors sitting on their original plastic stands on my desk, and I could not figure out why my neck hurt every afternoon. One sat slightly higher than the other. I was always turning a little to the left. The cables pooled behind them like a pile of spaghetti. The whole thing felt temporary, even though I used it every single day. Then I learned that dual monitors only help your body when they are positioned correctly, and mine were not even close. Once I fixed the setup, using a VIVO dual monitor mount to get both screens off their stands and adjusted properly, the afternoon neck ache was gone by the end of the first week.
This guide walks you through exactly how to do it right the first time. We will cover how to choose the best mounting position for your desk, how to set the correct height and angle for both screens, how to handle the cables so they stop ruining the calm of your space, and how to fine-tune your seated posture once everything is in place. Whether you already have a monitor arm or are shopping for one now, these steps apply. I will point out where having an adjustable arm mount, rather than fixed stands, makes the ergonomics dramatically easier to get right.
Your neck is going to thank you. Here is the mount that makes correct positioning actually achievable.
The VIVO dual monitor desk mount holds two screens up to 30 inches and 22 lbs each, adjusts fully for height, tilt, and swivel, and installs in about 20 minutes. Over 60,000 buyers have reviewed it at 4.6 stars. It is the single easiest way to unlock every ergonomic adjustment in this guide.
Amazon Check Today's Price on Amazon →Step 1: Choose Your Mounting Method and Clear Your Desk Surface
Before you touch either monitor, decide how you are going to mount them. You have two options: a freestanding dual monitor stand that sits on the desk surface, or a clamp-style arm that attaches to the desk edge and lifts both screens completely off the surface. For most home desks, the clamp style is the better choice. It eliminates the monitor base footprint entirely, which recovers about 10 to 12 inches of desk depth. On a standard 24-inch-deep desk, that is a meaningful amount of reclaimed space.
If you go with the clamp style, check your desk thickness first. Most clamp mounts, including the VIVO, accommodate desks from about 0.4 inches to 3.9 inches thick. Most standard desks fall well within that range, but if yours is a very thin IKEA top or a thick butcher block, measure it before you order. Also look at the underside of your desk at the clamping spot. If there are metal rails, cable trays, or drawers right under that edge, you will need to clamp in a slightly different spot or use the included grommet mount option instead. With the mounting method decided, clear everything off your desk. Doing the installation with a clear surface makes positioning much easier and prevents you from scratching anything.
Remove both monitors from their original stands if they are currently using them. Most monitors have a VESA mounting plate on the back, either 75x75mm or 100x100mm, which is a square pattern of four screw holes. Nearly every modern monitor made in the last 10 years has one. Locate the VESA pattern on the back of each screen before you start so you know you have the right screws ready when you need them. The VIVO mount ships with both VESA sizes included.
Step 2: Install the Desk Clamp and Attach the Arm Assembly
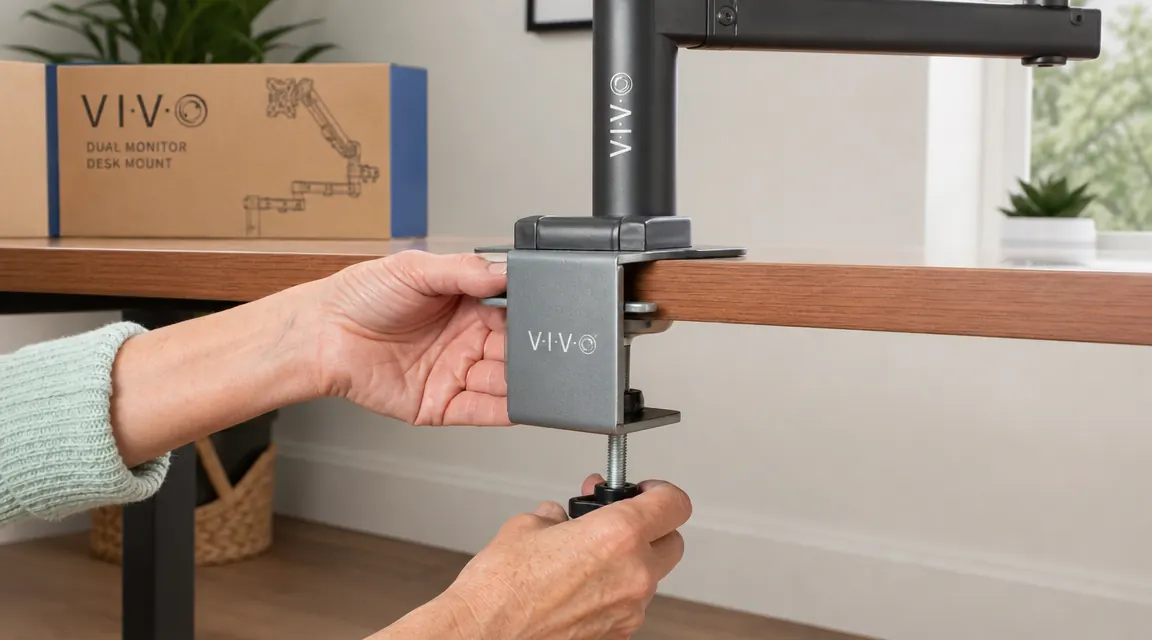
Set the clamp base at the center-rear of your desk, or slightly to whichever side aligns better with your natural gaze. Most people set it at the very back center. Position the rubber pad from the clamp against the desk top to protect the surface, then tighten the clamp bolt from below until the base is completely firm. It should not shift at all when you push on it. Do not rush this step. A loose clamp will let the whole assembly tilt over time as you adjust the screens, and you will end up re-doing it anyway.
Once the base is locked in, thread the vertical pole into the base and hand-tighten it. Then attach the dual arm bracket to the pole at your rough estimated height. You will fine-tune height in Step 3, so do not worry about getting it perfect now. Slide both monitor arms onto their brackets, leaving the tension knobs loose enough to allow movement. At this stage you want the whole frame assembled and stable before you add the weight of the monitors. Give the assembly a firm push from several angles. If anything feels wobbly, check that the clamp is fully tight and that the pole is seated evenly in the base.
Step 3: Mount the Monitors and Set the Correct Height
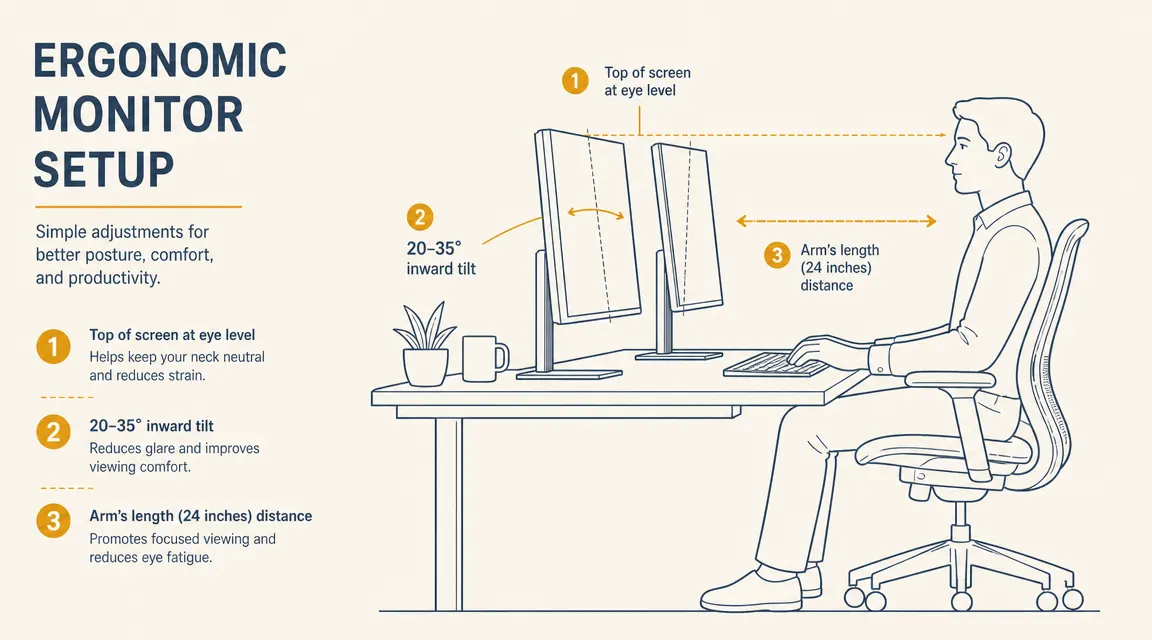
Attach the first monitor to its arm bracket using the VESA screws. Finger-tighten to start, then snug them with a screwdriver. Do not overtighten. Repeat for the second monitor. With both screens attached, sit down in your actual working position, look straight ahead, and notice where your eyes land relative to the screens. The rule: the top edge of each monitor should be at or very slightly below your eye level when you are sitting up straight. If the top of the screen is higher than your eyes, you will tilt your head back and compress the base of your skull. If it is too low, you will hunch forward. Most people initially set their screens far too high.
Adjust the height of the arm until the top of each screen aligns with your natural eye level. With the VIVO arm, you do this by loosening a tension knob, repositioning the arm along the pole, then retightening. Check again from your seated position. Then tilt each screen back very slightly, about 10 to 15 degrees, so the face of the monitor is perpendicular to your line of sight rather than pointing straight up at the ceiling. This small tilt is what eliminates the reflection from overhead lights hitting the screen at your angle.
Step 4: Position Both Screens for Comfortable Side-by-Side Viewing
The horizontal arrangement of your two monitors matters almost as much as the height. If one screen is your primary working screen and the other is secondary, place the primary screen directly in front of you and the secondary off to the side at about a 30-degree angle. You should not have to rotate your torso to use the primary. If you use both screens equally throughout the day, center the joint between them at the midpoint of your body so each screen is equidistant from your center and angled about 15 to 20 degrees inward toward you. This creates a gentle arc rather than two flat panels staring straight ahead.
Distance is the other variable people get wrong. Stretch your arm out toward the screen. Your fingertips should just about touch it. If they fall well short, the screen is too far and you will lean in. If your arm is bent to reach it, the screen is too close and your eyes will strain trying to resolve fine text. About 24 inches is the sweet spot for most people using 24 to 27-inch monitors. If you have large monitors, 27 inches or bigger, you can push them a few inches further back and increase text size slightly in your display settings to compensate. The goal is that you can read comfortably from your natural seated posture without any movement toward the screen.
The moment I stopped treating the second monitor as an afterthought and positioned it with the same care as the first, the whole desk started feeling like a place I actually wanted to be.
Step 5: Route the Cables and Lock in Your Final Adjustments
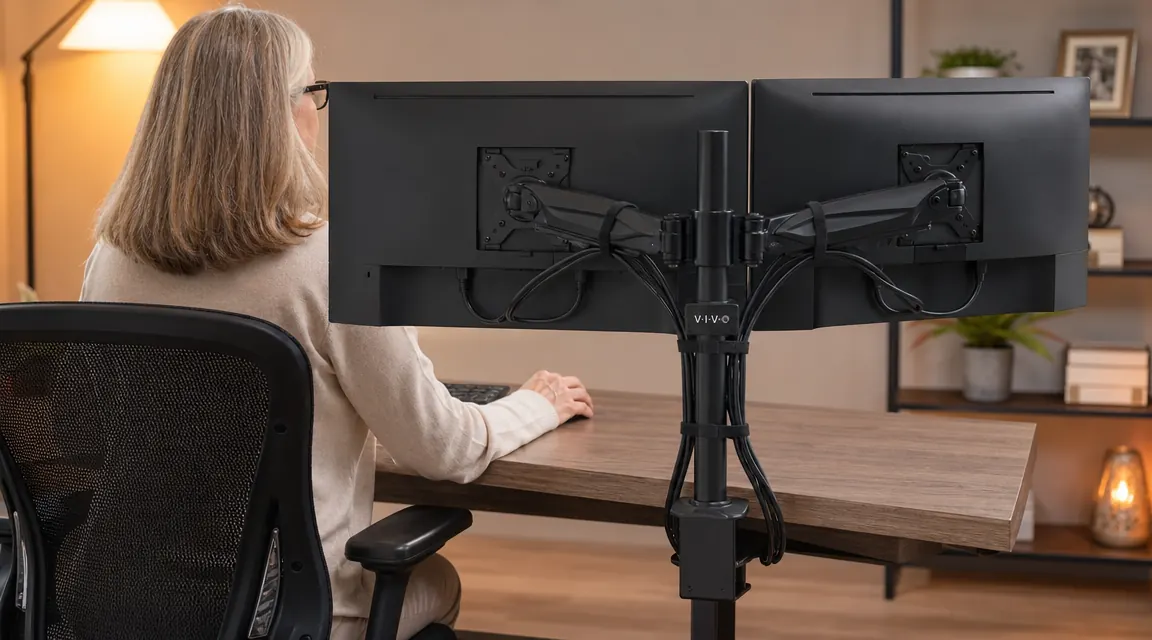
Cable management is where most dual monitor setups fall apart aesthetically, even when the ergonomics are solid. With a monitor arm, you have a real advantage: the arms have built-in cable clips or routing channels, and you can bundle both monitor cables together to run cleanly down the pole to the desk. Start by looping both display cables (HDMI or DisplayPort) loosely along each arm. Do not pull them tight, leave a little slack so that when you tilt or swivel a screen, the cable does not yank. Gather the cables at the base of the pole with a velcro tie, then run them along the back edge of the desk to your computer or dock.
Power cables are the harder part. If both monitors plug into a power strip on the desk, route those cables through the same velcro bundle down the rear of the desk. If you have an under-desk cable tray, this is the moment it earns its place. Drop the bundle into the tray so nothing hangs visibly below the desk edge. Then take one honest look at your desk from your seated position. If you can still see cable loops or trailing wires, add one more velcro tie. The goal is not Instagram perfection but functional tidiness, because a clean visual field genuinely reduces the low-level mental noise that a chaotic workspace creates.
With cables managed, tighten the arm tension knobs to your preference. Tighter means the monitors hold position firmly and require deliberate force to reposition. Looser means you can nudge them easily but they may drift slightly on their own over time. Most people end up somewhere in the middle: firm enough that the screens stay put under normal use, loose enough that you can adjust them within 30 seconds when needed. Do a final seated posture check. Sit with your back fully against your chair back, feet flat on the floor, and both hands resting naturally on the keyboard. Your gaze should fall naturally at the top third of the primary screen. If you are looking up or down even slightly, readjust the height now.
What Else Helps a Dual Monitor Setup Feel Right
The physical positioning is the foundation, but a few software settings close the gap between a technically correct setup and one that feels effortless. First, make sure both monitors are set to the same brightness and color temperature in your display settings. When one screen is noticeably brighter or bluer than the other, your eyes are constantly adjusting as they move between screens, which causes fatigue faster than you would expect. Most modern operating systems let you calibrate brightness and color balance per monitor. Take five minutes to get them matching.
Second, configure your operating system to treat the screens as a single extended display rather than mirroring. On a Mac, go to System Settings, Displays, and arrange the two screens to match their physical positions on your desk. On Windows, right-click the desktop, choose Display Settings, and drag the monitor icons to match your physical layout. This sounds simple but it is the step most people skip, and when they do, moving the mouse from one screen to the other requires moving in the wrong direction, which is quietly maddening.
If you are finding that you use one screen significantly more than the other, also check your chair position relative to the desk. Sometimes a dual monitor setup reveals that your chair is positioned too far to one side of the desk, which forces you to compensate with a head turn that the arm position cannot fix. Center your chair on your keyboard, not on the desk itself. If your desk chair has armrests, make sure they are set at a height where your elbows rest at about 90 degrees when your hands are on the keyboard. Forearm fatigue often gets blamed on screen position when the chair armrests are the actual culprit. For a full ergonomic chair setup walkthrough, see our guide on how to set up an ergonomic chair for your home office.
The VIVO dual monitor mount is what made all of these adjustments accessible to me without calling in a favor or spending an afternoon with an Allen wrench. At its current price, it is genuinely one of the higher-leverage upgrades in a home office setup. You do not need a $200 monitor arm to get your screens positioned correctly. You need one that adjusts freely, holds position when set, and gets out of the way. The VIVO does exactly that, which is probably why over 60,000 people have reviewed it and the rating has held at 4.6 stars. For a deeper look at how it performs with heavier screens, take a look at our long-term VIVO dual monitor stand review. And if you are still deciding between the VIVO and a pricier arm, our VIVO vs Ergotron LX comparison breaks down exactly where the price difference does and does not matter.
If you followed these steps and your desk still feels off, the mount is probably the variable to fix first.
The VIVO dual monitor desk mount gives you full control over height, tilt, and swivel on both screens independently. Holds two monitors up to 30 inches and 22 lbs each. Steel construction, easy clamp install, built-in cable management. Over 60,000 reviewers agree it gets the job done without drama.
Amazon Check Today's Price on Amazon →