
I spent three years with a dull ache between my shoulder blades that I blamed on everything except the obvious culprit. I thought it was stress. I thought it was sleeping wrong. I eventually bought a proper ergonomic chair, the Staples Hyken, expecting the pain to vanish. It did not, at first. Because I had never actually set the chair up correctly. I had just sat in it the same way I had been sitting in my old dining chair, and called it done.
Here is the thing nobody tells you at the store: an ergonomic chair that is adjusted wrong is just a more expensive version of a bad chair. The Hyken has six separate adjustment points. Most people use one, maybe two. The rest stay at factory defaults, which were calibrated for nobody in particular. Getting all six right takes about fifteen minutes and it changes everything. This guide walks you through each one, in the order that makes sense.
The chair this guide is built around: the Staples Hyken with 4.4 stars across 3,600+ reviews.
If you do not have an ergonomic chair yet, the Hyken is where most home office workers start. Good lumbar system, mesh back for airflow, solid adjustability range for the price.
Amazon Check Today's Price on Amazon →Step 1: Get Your Seat Height Right Before Touching Anything Else
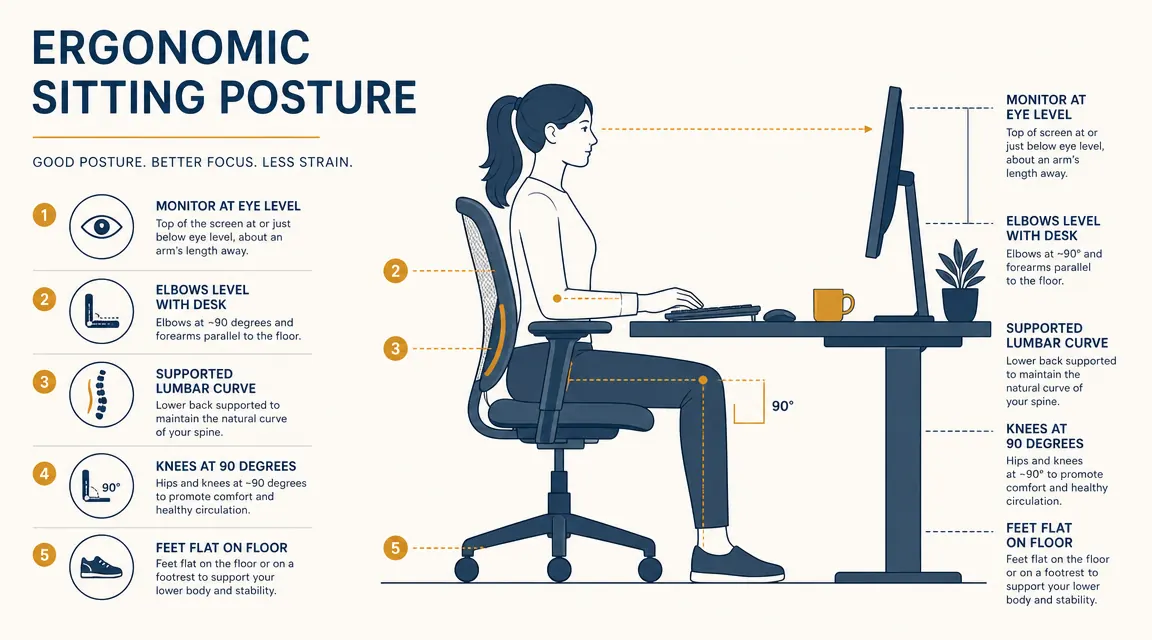
Seat height is the foundation. Every other adjustment depends on it being correct first. Sit down, plant your feet flat on the floor, and check your knees: they should be at roughly a 90-degree angle, with your thighs parallel to the floor or angled very slightly downward. If your knees are higher than your hips, the seat is too low. If your feet are dangling or your thighs are angled sharply downward, the seat is too high.
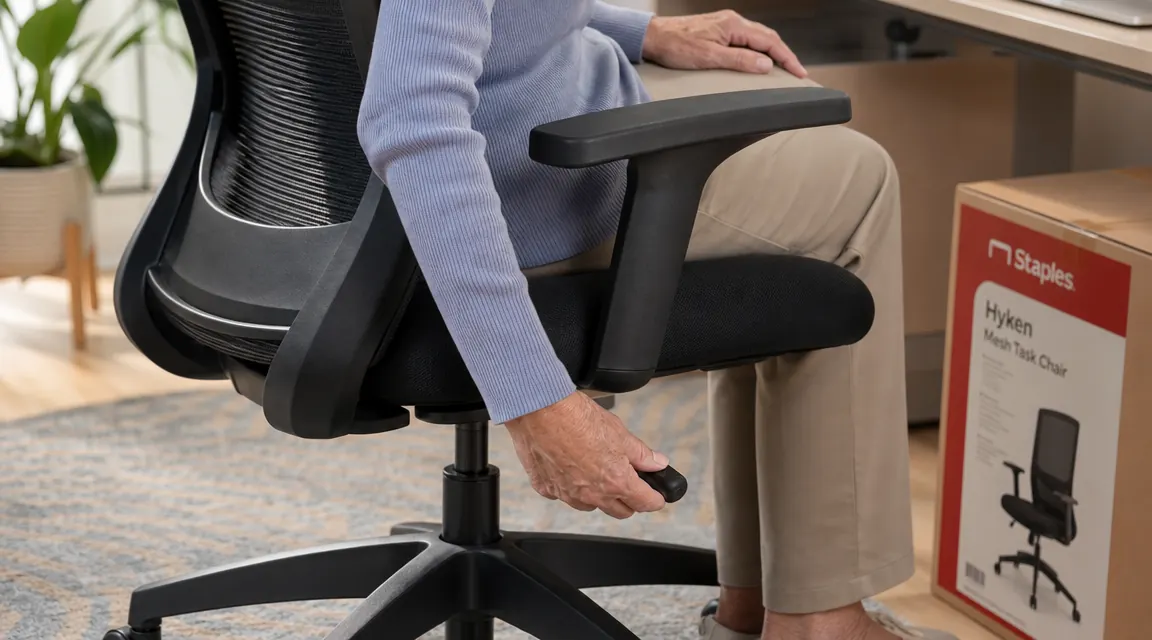
On the Hyken, the height lever is a large paddle under the right side of the seat. Pull it up to raise, push down on the seat while pulling the lever to lower. The adjustment range on the Hyken runs from about 17 to 21.5 inches, which covers most people under six feet comfortably. If you are taller than 6'1", you may need to check clearance under your desk before raising the seat all the way. Get the feet flat and knees neutral before moving to step two.
One thing I got wrong for months: I set the seat height so my elbows lined up with the desk, not my knees with the floor. That is backwards. Desk height or monitor height get adjusted to you after the chair is set. Start from the ground up, literally.
Step 2: Adjust the Lumbar Support to Your Actual Lower Back
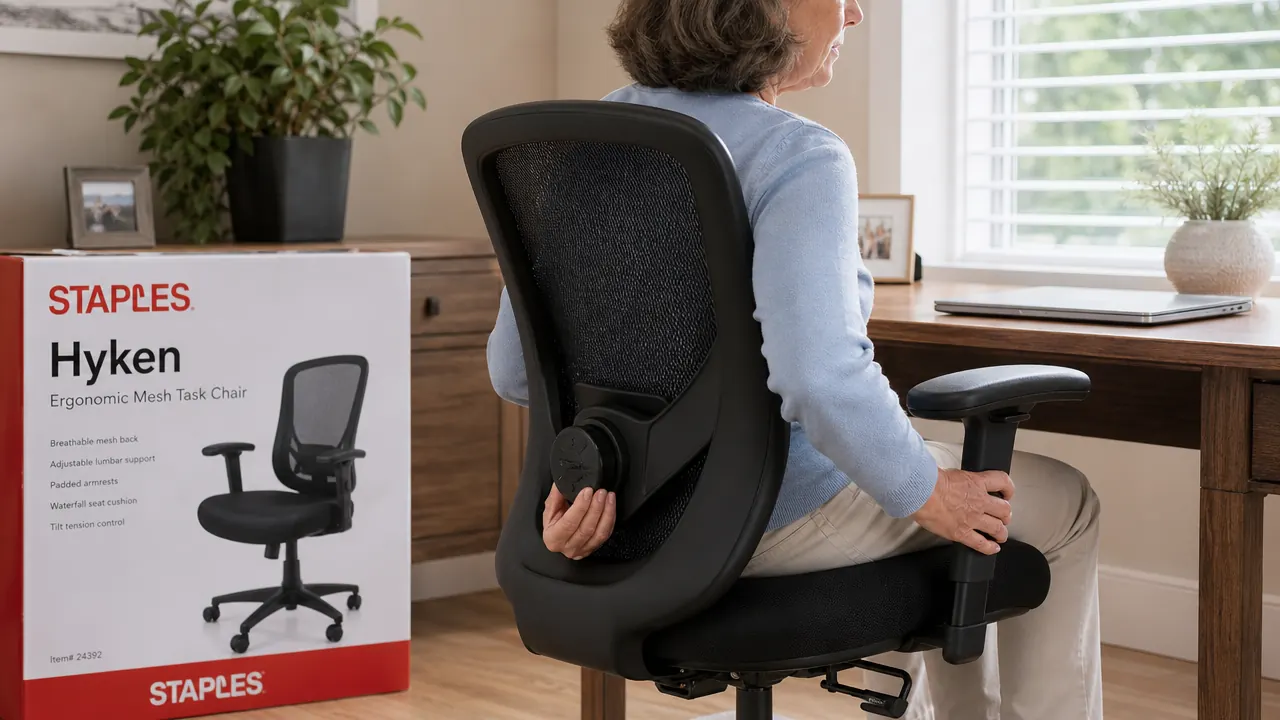
This is the step most people skip entirely. The Hyken's lumbar support is not fixed in place. There is a dial on the back of the chair, on the inner lower frame, that lets you raise or lower the lumbar pad by a couple of inches. The target position is the inward curve of your lower back, roughly where a belt buckle sits. Too high and it pushes on your mid-back. Too low and it does nothing, just pressing the back of the seat frame against your tailbone area.
Sit back fully in the seat so your lower back touches the lumbar pad. Then reach behind and adjust the dial until the pad presses gently into that natural inward curve. You should feel mild support, not a shove. If your instinct is to lean forward away from it, the lumbar is too aggressive or positioned too high. Ease it down until you can comfortably rest your back against it while sitting upright.
Most people skip the lumbar dial entirely. Moving it two inches changes whether the chair actually supports you or just decorates the room behind your back.
Step 3: Set the Armrests So Your Shoulders Can Let Go
Armrests set too low are useless. Armrests set too high force your shoulders up toward your ears, which is its own kind of tension. The target: armrests at exactly the height where your elbows rest naturally with your shoulders relaxed and your upper arms hanging straight down. That should put your forearms roughly parallel to the floor when you are typing.
The Hyken's armrests adjust vertically with a button on the underside of each pad. Press and slide. They also pivot slightly inward and outward. For typing, most people do better with the armrests angled a little inward so your forearms track toward the keyboard without twisting at the wrist. Take a moment to deliberately drop your shoulders after you adjust. If they fall even a little bit, you found the right height.
Side note: if your desk is significantly lower than your elbows-at-rest position, you have a desk height problem, not a chair problem. Raising the desk with furniture risers or switching to an adjustable-height surface is a separate conversation, but worth noting here.
Step 4: Adjust the Seat Depth for Your Leg Length
Seat depth is the distance between the front edge of the seat pan and the back. The right depth leaves two to three finger-widths of space between the back of your knees and the front edge of the seat. Too deep and the edge cuts into the backs of your thighs, restricting circulation. Too shallow and you are perching on the front edge with nothing supporting the middle of your thighs.
The Hyken allows a small sliding adjustment on the seat pan itself. Slide it forward if you are shorter in the leg and the back of the seat is pushing your body away from the lumbar support. Slide it back slightly if you are longer-legged and feel cramped at the front edge. This is a subtle adjustment but it matters for anyone on the shorter or taller ends of average, roughly under 5'4" or over 6'0".

Step 5: Set the Recline Tension and Lock to Match How You Actually Work
The recline on the Hyken is controlled by a tension knob under the seat, usually on the left side. Turning it clockwise adds resistance, counterclockwise loosens it. The right tension is one where you can recline gently when you lean back and think, but the chair does not tip you backward every time you reach for your coffee.
There is also a tilt lock lever that lets you fix the chair in a slightly reclined position. This is genuinely useful for reading or video calls where you want a relaxed position without actively holding yourself back. Unlock it when you are in a focused typing mode and want the light bounce of a floating recline. Lock it slightly back when you are in a listening or reading posture. Most people leave this in one fixed position forever. Experimenting with it through the day is actually one of the better habits for reducing fatigue.
A mistake I made for the first few weeks: I tightened the tension all the way because I thought maximum resistance meant maximum support. It does not. A completely locked-out, bolt-upright chair is tiring over a long day. The light spring of a well-tensioned recline lets your body shift slightly without forcing you to stand up and stretch every forty minutes.
What Else Helps Once the Chair Is Right
Getting the chair adjusted correctly is the single biggest lever in a home office ergonomic setup, but it does not exist in isolation. Your monitor height matters just as much. The top of your screen should be at or just below eye level so your neck is neutral, not craned upward at a laptop screen on the desk surface. Most people who work from a laptop need either a separate monitor or a laptop riser with a keyboard, because the laptop screen and keyboard cannot both be at correct heights simultaneously.
Lighting matters more than people expect. Working into overhead fluorescent light or a window directly in your line of sight creates a kind of low-grade tension that accumulates over the day, whether or not you consciously notice it as glare. Warm, indirect task lighting positioned to the side, not behind the screen, makes a long session feel different. I noticed this more than I expected when I finally addressed it.
Finally, even a perfect chair setup does not fix the problem of sitting still for six hours straight. The research on this is consistent: short movement breaks, two to three minutes every fifty to sixty minutes, do more for back pain than any chair alone. Set a timer if you have to. Stand up, walk to the kitchen, do a slow neck roll. The chair keeps things comfortable while you are in it. You still have to get out of it regularly.
If you are still shopping for the chair itself, the full breakdown of the Hyken's lumbar system, durability after eight months of daily use, and who it fits best is in the long-term Staples Hyken review. If you are weighing the Hyken against a more expensive option, the Hyken vs. Autonomous ErgoChair comparison lays out exactly where the price gap does and does not matter.
Ready to actually feel the difference? Start with a chair that gives you all six adjustment points to work with.
The Staples Hyken is rated 4.4 stars by more than 3,600 buyers and is one of the most-recommended ergonomic chairs in its price range. Worth checking today's price before deciding.
Amazon Check Today's Price on Amazon →